 You will need:
- Air Dry Clay (I used DAS in white)
- Cocktail stick
- Fine sandpaper/emery
- Varnish
- Needle & thread
- Superglue
- Ring base
- Cocktail stick
- Fine sandpaper/emery
- Varnish
- Needle & thread
- Superglue
- Ring base
1. Begin by rolling out your clay to about 3mm thickness, and cut out a 1 inch square with a knife. I used a ruler for this to ensure accuracy – you could use a template too.
2. With a cocktail stick poke holes along the edge of the square – wiggling the stick to make sure the hole is big enough to fit a needle through. Each side should have 5 holes. Turn the square over to even out the holes from the other side.

3. Allow the clay to dry out completely before sanding it down with sandpaper to ensure the surface is completely smooth. Varnish the square and leave to dry – make sure the holes do not get blocked by the varnish (you can re-poke with your cocktail stick!)
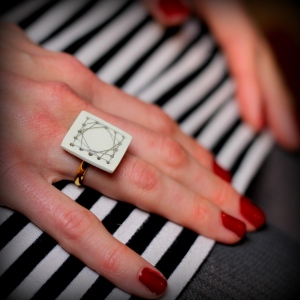
5. Take a needle and select your preferred thread colour then simply thread the clay in whichever pattern you chose, knotting the end once complete and painting a layer of varnish onto the back to give the thread extra stability.


6. Glue the square of clay into place onto your ring base.

Hooray finished!


Δεν υπάρχουν σχόλια:
Δημοσίευση σχολίου